Today, I just wanted to share with you guys how I achieved this simple makeup look.
These are all of the products that I used & I hope you learn something from this post :)
1) Moisturize: St. Ives Timeless Skin Facial Moisturizer
2) Face Primer: Smashbox Photo Finish Primer
 |
| Photo Credit: Sephora |
3) Foundation: L'oreal Infallible Pro Matte Foundation
Third, I used this foundation and along with my Real Techniques Beauty Blender. I carefully applied foundation on my entire face and blended it out with the beauty blender. In my case, I bought the foundation online so I wasn't exactly sure what my shade was. It was a guesstimate. Needless to say, it was a little lighter than what I expected (oops). I bought it in the shade "Classic Ivory." The foundation is alright, it cracks at a few places so I would not recommend it for those with dry skin.
4) Concealer: Makeup Forever Full Coverage Concealer
 |
| Photo Credit: Sephora |
Then, I used my E.L.F. Mineral Brush Powder to apply the power on my face. I got it in the shade translucent, but to be honest... it kind of made my face darker. It's not that darker, but I could tell there was a clear difference. Nevertheless, this affordable powder makes my face look very matte but also natural at the same time!
I tend to use three products for my eyebrows. I mix and match between the Anastasia Beverly Hills Dip brow Pomade and the Anastasia Beverly Hills Brow Powder Duo. For the dip brow, I got it in the shade "Chocolate" and for the brow powder duo, I got it in the shade "Taupe". I use a small angled brush from E.L.F. cosmetics to define my eyebrows with either of these products. Then, I tend to use this eyebrow pencil (don't know the brand or anything) to fill in any sparse spaces I have in my eyebrows. Finally, I use the concealer brush from E.L.F. as well (I love E.L.F.) to clean up the edges to make it look natural but fleeky :)
I wanted to try out a different blush this time! I got it in the shade "Orgasm" (I kind of got it just because of the name) It is a very nice pink shade that looks nice on my own complexion. I applied this near the apple of my cheeks with a blush brush from E.L.F. Sorry if the product looks dirty! I've had it for a very long time. An oldie, but goodie.
8) Eyeshadow: Urban Decay Naked 3 Palette
First, I applied Too Faced's Shadow Insurance on my eyelids. Then, I used the brush in the palette and slightly applied "Limit" all over the lids. Next, I applied "Nooner" on the outer 3rd of my eye (hope that makes sense). I went over near the middle half of my eye and applied "Dust" & "Buzz" together.
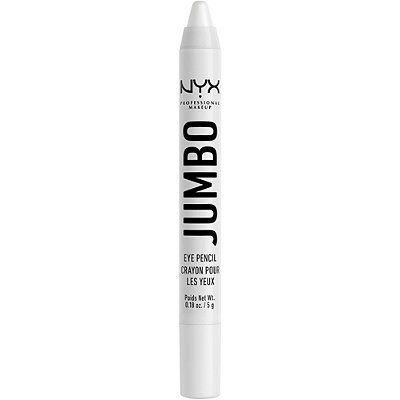
9) Inner Corner: Nyx Jumbo Eye Pencil
To finish the look, I applied Nyx's eye pencil in the color "Cottage Cheese."
8) Eyeshadow: Urban Decay Naked 3 Palette
First, I applied Too Faced's Shadow Insurance on my eyelids. Then, I used the brush in the palette and slightly applied "Limit" all over the lids. Next, I applied "Nooner" on the outer 3rd of my eye (hope that makes sense). I went over near the middle half of my eye and applied "Dust" & "Buzz" together.
9) Inner Corner: Nyx Jumbo Eye Pencil
 |
| Photo Credit: Ulta Beauty |
To finish the look, I applied Nyx's eye pencil in the color "Cottage Cheese."
I really love Ardell lashes. They look very natural, but they're also voluminous. I applied mascara on beforehand, curled my lashes, then applied my Ardell lashes. They last all day and I also get sooooooooooooo many compliments on them! Everyone loves them and these eyelashes are perfect.
11) Highlighter: Mary Lou Manizer
12) Lastly - Lips: E.L.F. Essential Lip Kiss Balms
I always tend to use different techniques when it comes to my lips. First, I applied Burt's Bees peppermint chapstick. Then, I applied the first lip balm in shade "Berry Sweet." Next, I applied a layer of the second lip balm in shade "XO Red." For the third layer, I applied another lip balm in the shade "Bare Kiss." After that, I used a paper towel to blot my lips. Finally, I applied a thin layer of Bare Kiss on my lips. I know it seems like a long process, but trust me... it's worth it. It keeps my lips hydrated and it's also long-lasting too!
I always tend to use different techniques when it comes to my lips. First, I applied Burt's Bees peppermint chapstick. Then, I applied the first lip balm in shade "Berry Sweet." Next, I applied a layer of the second lip balm in shade "XO Red." For the third layer, I applied another lip balm in the shade "Bare Kiss." After that, I used a paper towel to blot my lips. Finally, I applied a thin layer of Bare Kiss on my lips. I know it seems like a long process, but trust me... it's worth it. It keeps my lips hydrated and it's also long-lasting too!
I guess that's all for now. I hope you enjoyed this blog post on how to achieve this simple makeup look! Let me know if you have any questions or concerns and I'll be happy to help you.
If you would like to follow me on social media, click on any of the links below. ♡
Like my Facebook page! ♡
Follow me on Twitter! ♡
Follow me on Instagram! ♡
Follow me on Pinterest! ♡
xx lovelies.
If you would like to follow me on social media, click on any of the links below. ♡
Like my Facebook page! ♡
Follow me on Twitter! ♡
Follow me on Instagram! ♡
Follow me on Pinterest! ♡
xx lovelies.


No comments:
Post a Comment